WRLC Storage Reshelving Procedures for BOOKS 2025
WRLC Storage Reshelving Procedures for BOOKS 2025
1. Scanning Procedures
Aim scanner and press the trigger to scan each barcode
-
-
-
-
Scan the tray location barcode on the tray then the item barcode on the book.
-
If more than one book need to go in the same tray, the tray location barcode will need to be scanned again.
-
-
-
2. Retrieving Items from Scanner
-
Plug the Opticon Scanner to the computer
-
Click on OPN Companion Application
-
Click on “get barcodes”
-
A txt file titled “Barcodes” will automatically appear on desktop listing the barcodes that were just scanned
-
Click on “delete barcodes” then “yes” to proceed *THIS IS VERY IMPORTANT!
-
Click on “close” then close the window
-
Open the “Barcodes” file and remove extra space at the end (be sure the cursor is at the end of the last barcode)
-
Save the file as text to:
C:\Users\your last name\WRLC\WRLC COMMON - Documents\1_Storage Refiles\Alma\Books\Row x & x
File name is the date that list was created
Ex. notepad_7_12_16
-
Delete the “Barcodes” file *THIS IS VERY IMPORTANT!
3. Uploading reshelved items
Use the SCF Processing website to upload reshelved books. If you needed to leave your desk briefly, it will be a good idea to refresh the page when you comes back before starting work to ensure everything is ready to proceed.
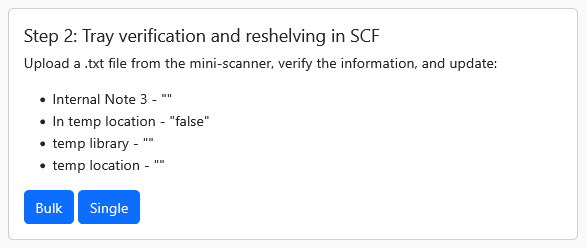
When items have been uploaded it means:
- The message, "SCF Hold Shelf" in Internal Note 3 has been cleared
- The Item is in temporary location has been switched to "No"
- The temporary library of "" has been removed
- The temporary location of "SCF Hold Shelf" has been removed
Do Step 2 to perform upload of the reshelved items. Click on "Bulk".
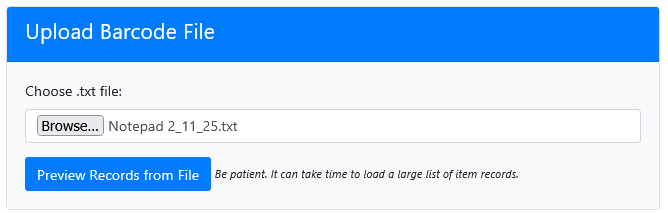
Select the file that was just created after uploading the items from the portable scanner.
Click on "Preview Records from File"
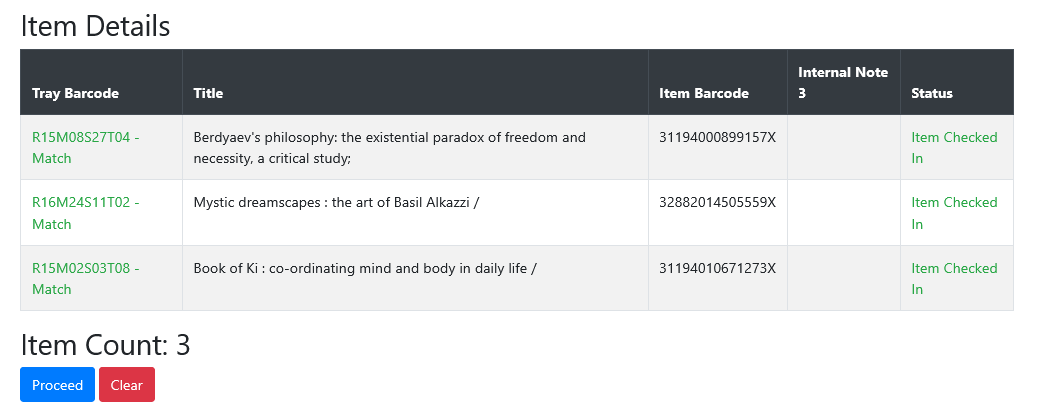
PLEASE VERIFY THE ITEM COUNT...MAKE SURE THE NUMBER IS THE SAME AS TO THE WORD DOCUMENT THAT WAS CREATED WHEN DOING THE PRE-RESHELVING PROCEDURE
Click on "Proceed" to have multiple fields in Alma updated
When you see "Updated Item Details" and "Updated", it means that the item records have been updated.
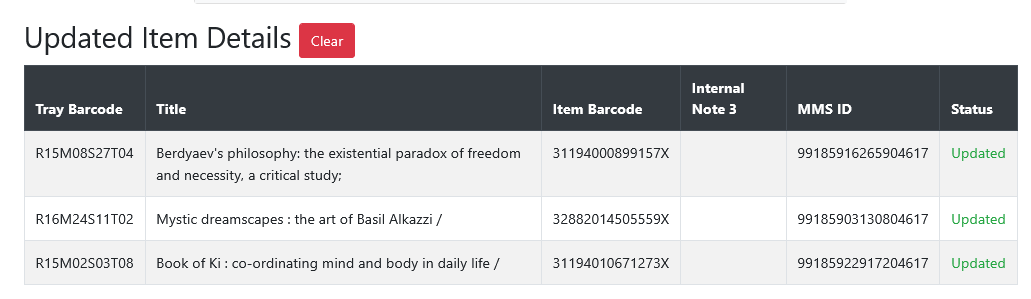
All done!
ISSUES:
1) Incorrect item barcode scanned. For example, Catholic books have both old and current barcodes:
OLD (barcode is shortened): 3053001646981
CURRENT: 30530003349875
If the old barcode was scanned and uploaded, this message will appear:

Steps to fix this:
- Click on "Proceed" so the remaining items could be updated.
- You will need to go back to the tray and get the book then give it to the supervisor.
- Make a note on the Word document
2) Item placed in the wrong tray or wrong tray location was scanned:
31194010728958 was placed in R21M19S30T08 when it should have been placed in R22M18S09T12.
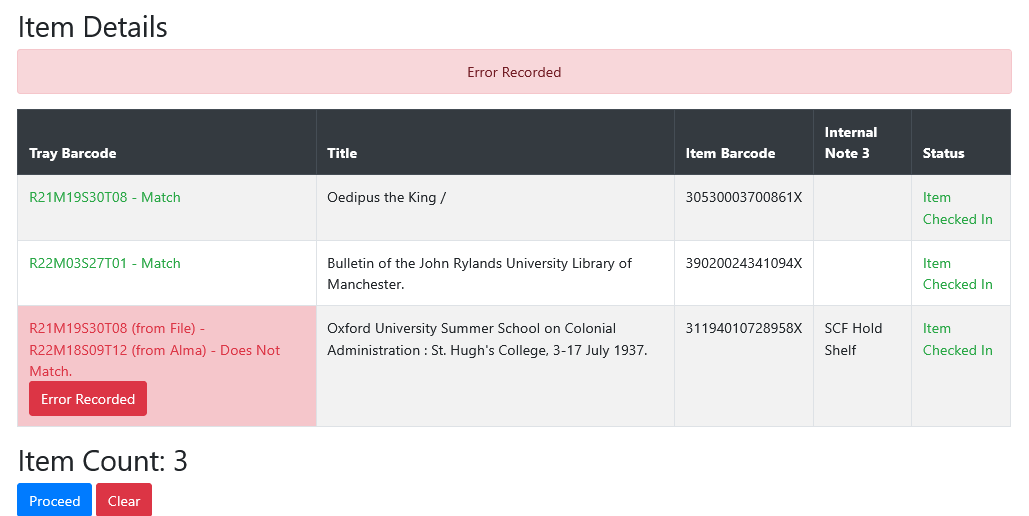
Steps to fix this:
- Click on "Proceed" so the remaining items could be updated.
- You will need to go back to the tray and get the book.
- Retrieve the slip that was in the book and put it back in the book then give it to the supervisor.
- Make a note on the Word document.
3) Internal note 1 is blank:
Tray location is missing from Internal Note 1 field.
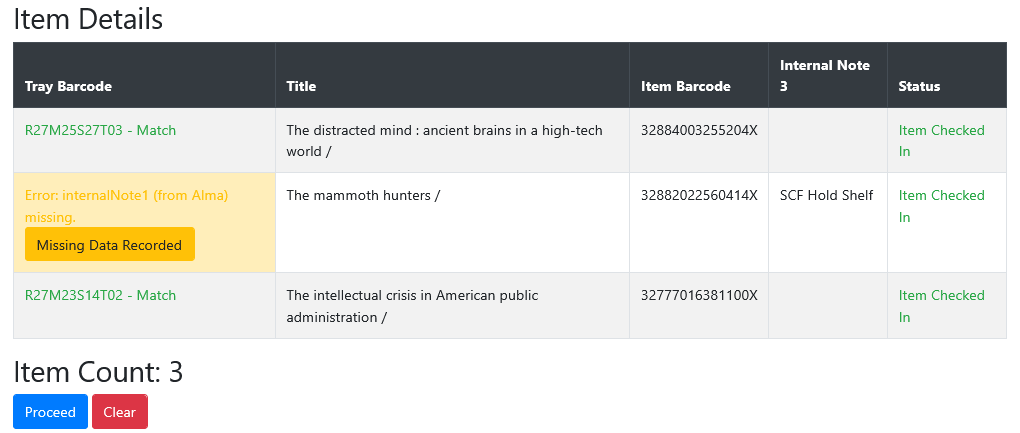
Steps to fix this:
- Click on "Proceed" so the remaining items could be updated.
- Send an email to the supervisor with item barcode.
- Make a note on the Word document.
4) Item is checked out:
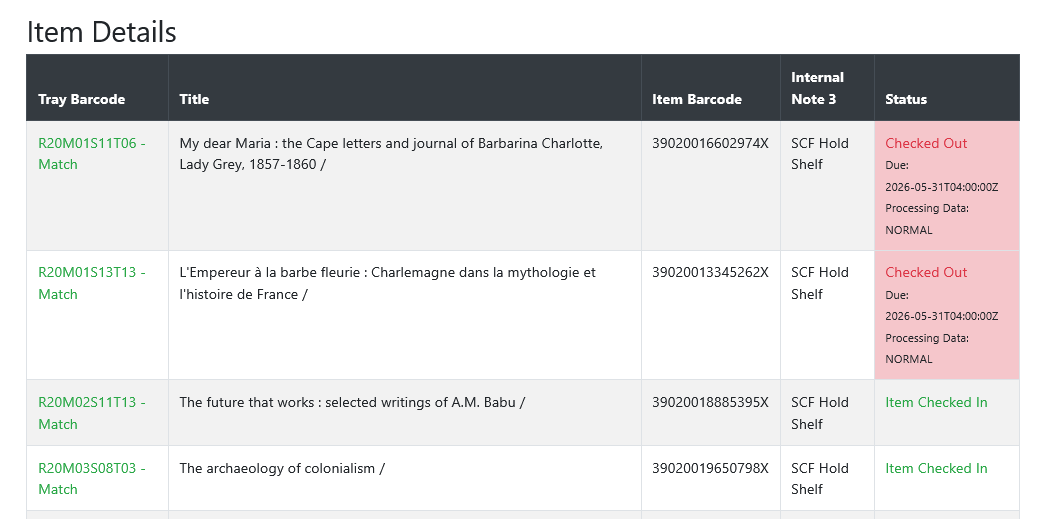
When you see a pink box with the message saying, "Checked Out", send an email to the supervisor with item barcode.
No Comments