Clear loan status for processed items that were never scanned in
When items from Voyager were migrated to SCF IZ in 2018 and items found eventually then added, this caused Alma to assign the loan status to the items even though items were already in the SCF.
Also, after new items get processed in Alma and people who does the processing may forget to scan them in which would mean the loan status would remain.
In order to clear the loan status, we will need to use Analytics to identify items with the loan date that has the same date as when items are created.
Click on "Analytics"
Click on "Access Analytics" under "Create Analysis"
When Analytics opens, click on Create > Analysis > Physical Items
In Analytics:
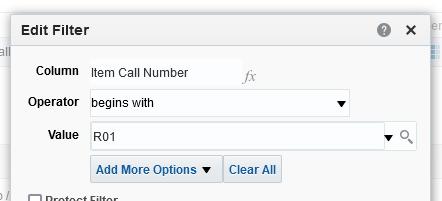
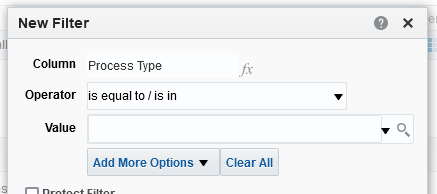
Apply filters by clicking on the cog wheel for Item Call Number and Process Type.
Item Call Number can be any row. In this screenshot, it is row 1.
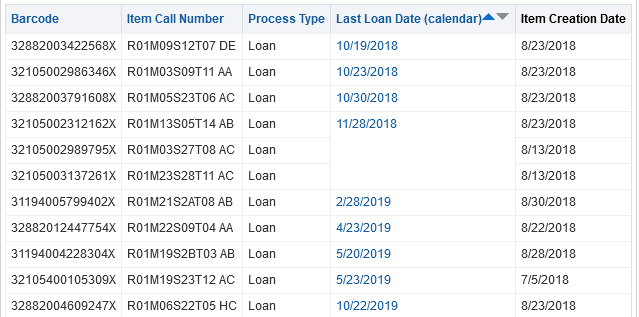
Click on the up arrow in the Last Loan Date (calendar) column to put the dates in order starting with the earliest date.
Please take your time when reading the dates. We don't want the actual loans to be touched.
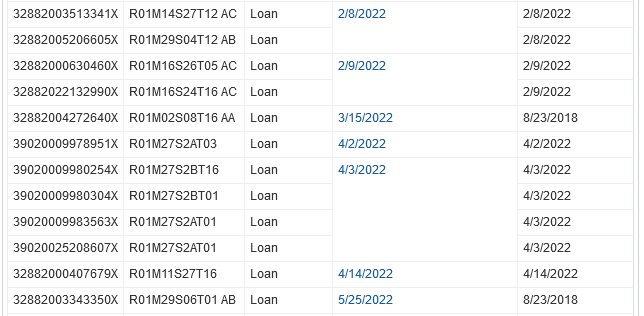
Look for the same dates.
No dates between Last Loan Date (calendar) and Item Creation Date are the same and this means these items are actual loans.
There are dates between Last Loan Date (calendar) and Item Creation Date that are the same and this means the loans are not real and they will need to be cleared.
- 2/8/2022
- 2/9/2022
- 4/2/2022
- 4/3/2022
- 4/14/2022
Copy the item barcodes to Notepad and save the file to anywhere on the computer.
32882003513341X
32882005206605X
32882000630460X
32882022132990X
39020009978951X
39020009980254X
39020009980304X
39020009983563X
39020025208607X
32882000407679X
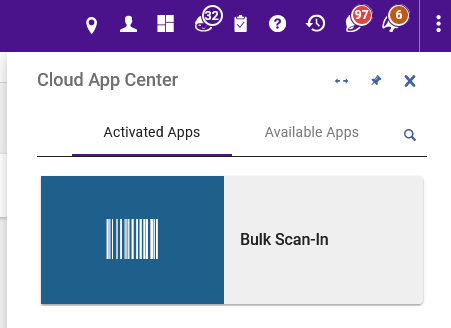
In SCF IZ, go to Cloud App Center and click on Bulk Scan-In.
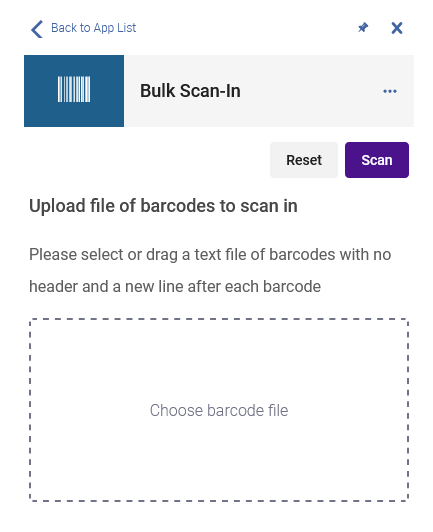
Drag the Notepad file to the box labeled, "Choose barcode file" then click on Scan. This will clear the loan status.
You can scan in items as many as you want...10 items at a time or 100 items, it doesn't matter. Just be sure to save the Notepad file before doing the bulk scan-in.


