Affiliate Library Configuration
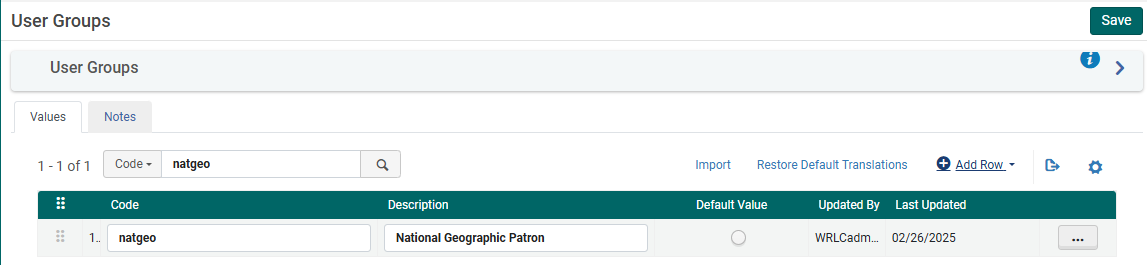
1. Create user group
- Configuration > User Management > User Details > User Groups
- + Add Row
- Choose a code and a description (preferably [Affiliate Library] Patron)
- Choose Add Row, and then Save the table
2. Apply user record group to a specific type
- Configuration > User Management > User Details > User Record Type/User Group
- + Add Row
- Choose the user group created in step #1, then choose a record type of Staff, Public, and Organization
- Choose Add Row, and then Save the table

3. Associate library location with Fulfillment Unit
- Configuration > Fulfillment > Physical Fulfillment > Fulfillment Units
- Edit the Fulfillment Unit Library Delivery Only
- Choose the Fulfillment Unit Locations tab
- Attach to the list the location(s) associated with the affiliate library
- Save the Fulfillment Unit
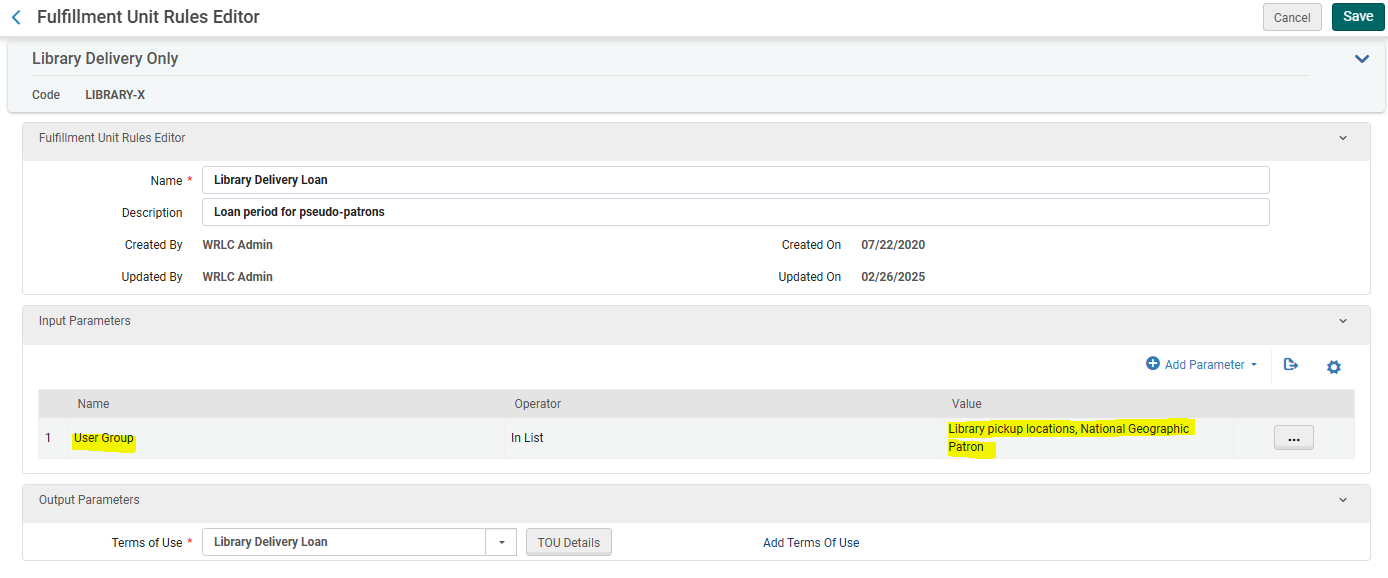
4. Associate user group with Fulfillment Unit
- Configuration > Fulfillment > Physical Fulfillment > Fulfillment Units
- Edit the Fulfillment Unit Library Delivery Only
- Choose the Fulfillment Unit Rules tab
- Choose the Rule Type Loan from the drop down menu
- Edit the Library Delivery Loan rule
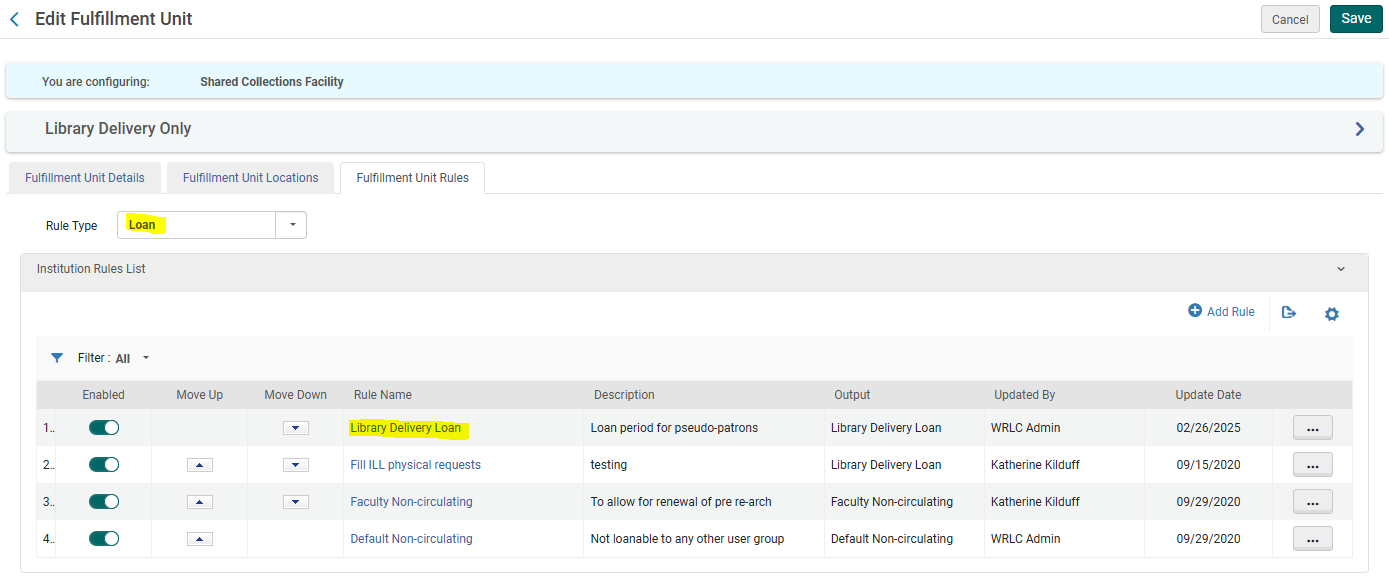
- Add the user group created in step #1 to the list of User Groups in the Input Parameters
- Save the Fulfillment Unit

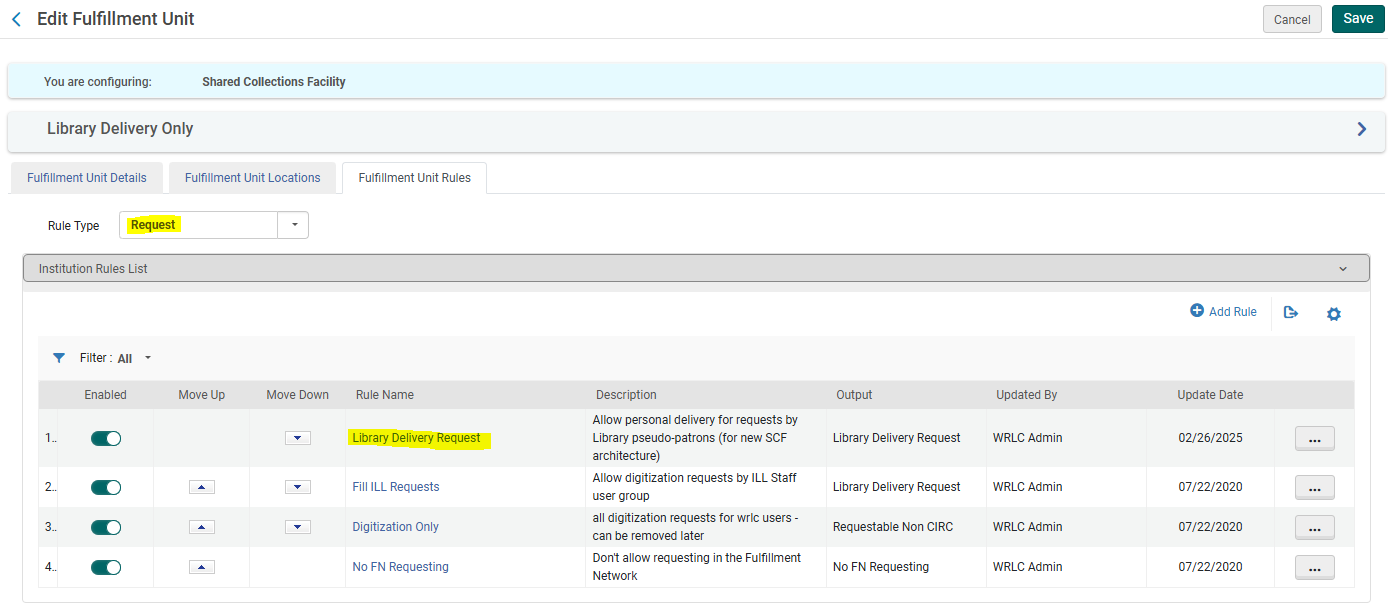
- Go back to the Fulfillment Unit Rules tab
- Now choose the Rule Type Request from the drop down menu
- Edit the Library Delivery Request rule

- Add the user group created in step #1 to the list of User Groups in the Input Parameters
- Save the Fulfillment Unit
5. Create a restricted search group for Primo VE
- Configuration > Discovery > Search Configuration > Restricted Search Groups
- + Add Restricted Search Group
- Choose a code, a name (preferably [Affiliate Library Name] Affiliate Library), and a description

- Add the Restricted Search Condition of:
- Search Index = Location
- Operator = Equals
- Value = all library locations associated with affiliate library

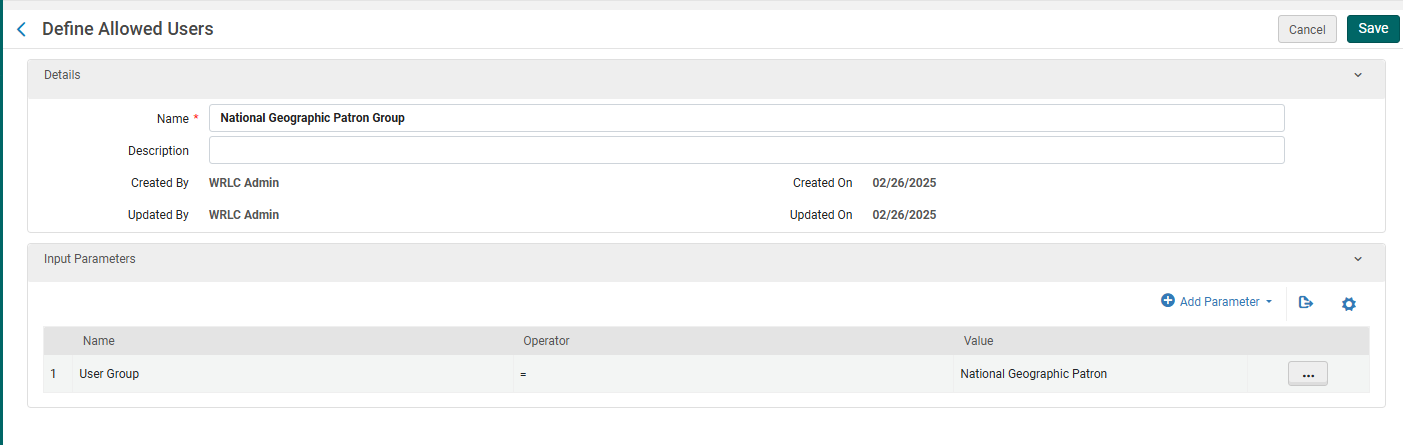
- Add the following Allowed Users:
- Patron Group Rule
- Name = [Affiliate Library] Patron Group
- Input Parameter
- Name = User Group
- Operator = "="
- Value = all user groups created in step #1

-
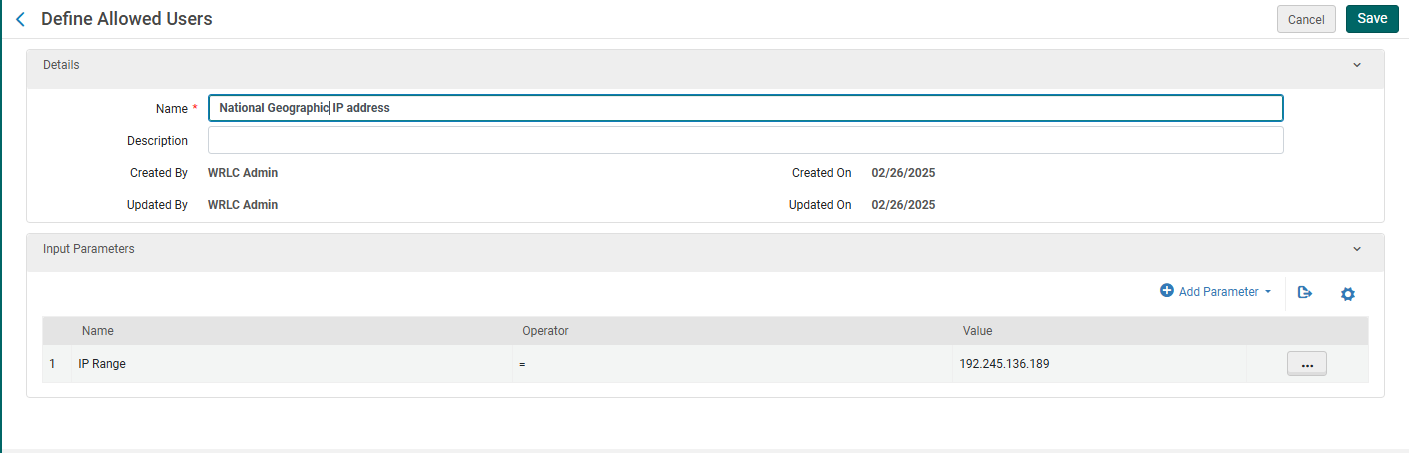
- IP Address Rule
- Name = [Affiliate Library] IP Address
- Input Parameter
- Name = IP Range
- Operator = "="
- Value = [IP range of affiliate library]
- Save the Restricted Search Group Definition
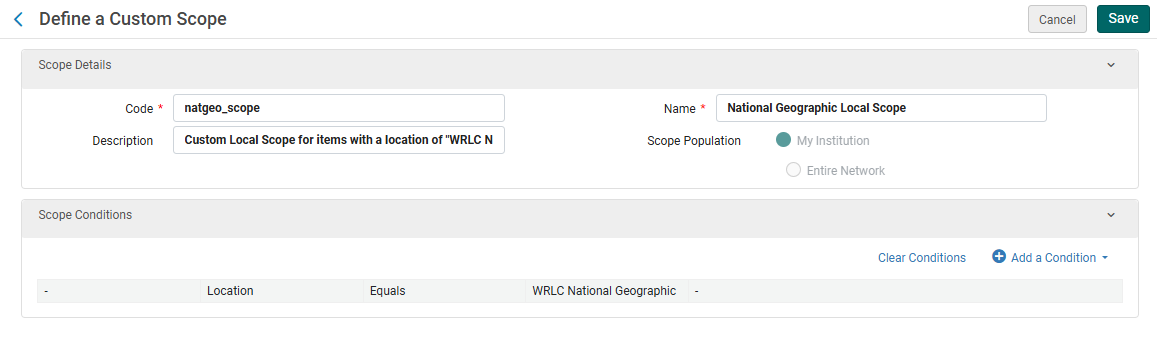
6. Create a custom local data search scope
- Configuration > Discovery > Search Configuration > Search Profiles
- Choose the Custom Local Data Scopes tab
- + Add a Custom Scope
- Choose a code and a name
- Then add the following Scope Condition:
- Search Index = Inventory > Location
- Operator = Equals
- Value = Location(s) associated with affiliate library
- Add Condition, then Save the Custom Scope
7. Create a search profile
- Configuration > Discovery > Search Configuration > Search Profiles
- Choose the Search Profiles tab
- + Add a Search Profile
- Choose a code and a display name
- Then add the following scope:
- Select Scope Type = Custom (Local Data)
- Select Custom Scope = the custom scope created in step #6
- Click Add and close, then Save the Custom Search Profile
8. Create a Primo VE view for affiliate library users
- Configuration > Discovery > Display Configuration > Configure Views
- + Add View
- Choose a code and a name
- Choose the following settings as you work through the configuration pages
- General tab > Discovery Network Settings section
- Display locations from member institutions = No
- Include member institution physical inventory in facets = Never

9. Create user profile(s)
- When creating user profiles for affiliate libraries, make sure the following fields have the correct values:
- General Information tab
- Primary ID = work email address
- User Group = user group created in step #1
- Password = create a temporary password for the user, checkmark Force password change on next login
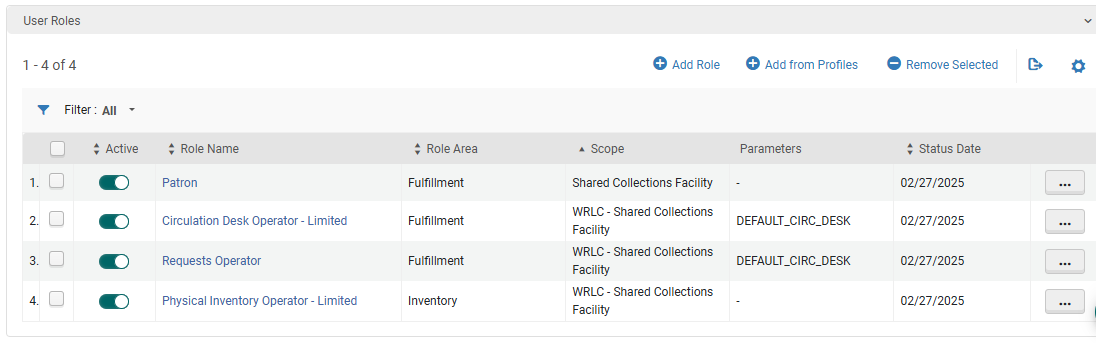
- User Roles (the following are necessary to allow for users to log into the SCF IZ and create requests through Alma)
- Patron
- Circulation Desk Operator - Limited
- Requests Operator
- Physical Inventory Operator - Limited

10. Update letter configuration for pull slip
- Configuration > General > Letters > Letters Configuration
- Search for the letter titled Ful Resource Request Slip Letter, choose Edit
- Edit the XSL around line 100 to include the following example
- Click Save Draft
- Click Save
<!--   Internal Alma request from affiliate institution [Insert affiliate library here}   -->
<xsl:when test="(notification_data/user_for_printing/user_group='[User Group Code]')">
<font size ="40px;">[Affiliate Library Name]</font>
</xsl:when>


No Comments